Installation
Installation Steps
Before you begin the installation process, ensure that you are logged into the JIRA instance with administrative privileges.
Here are the installation steps for AI Jeannie JIRA plugin:
-
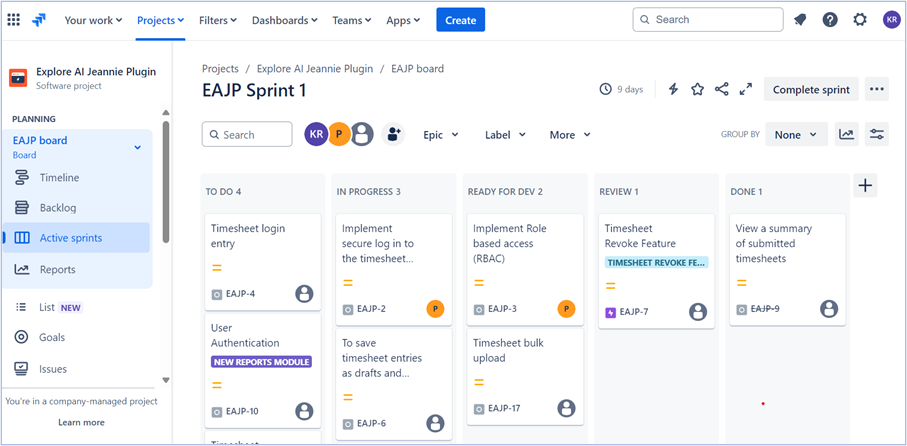
Log in to the JIRA instance to install the AI Jeannie JIRA plugin as shown below.
-
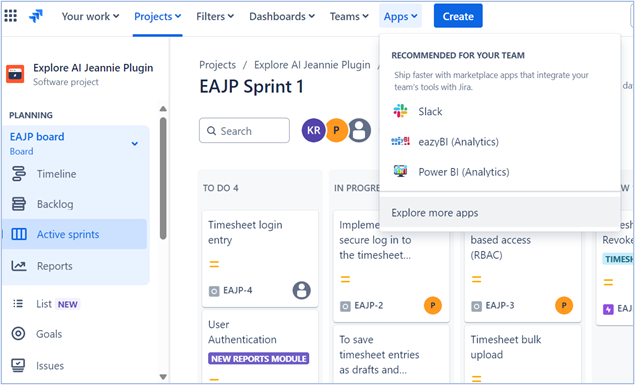
Select Apps > Explore Apps at the top as shown below.
-
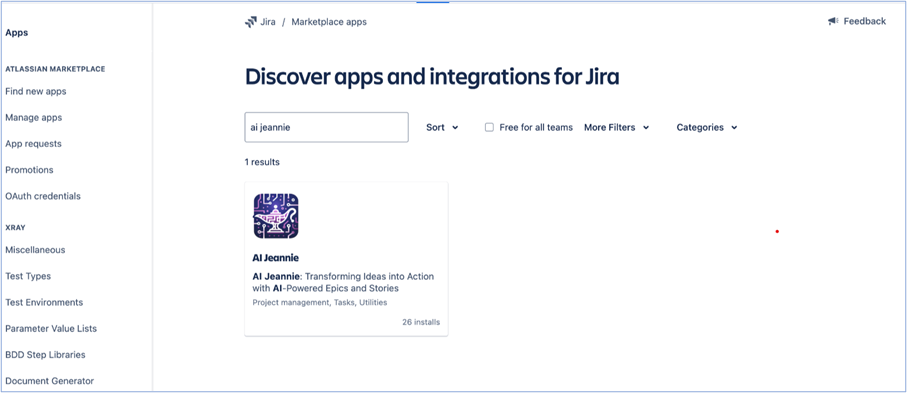
Goto Apps > Atlassian Marketplace from left pane and enter “AI Jeannie” in search for apps in right pane as shown below.
-
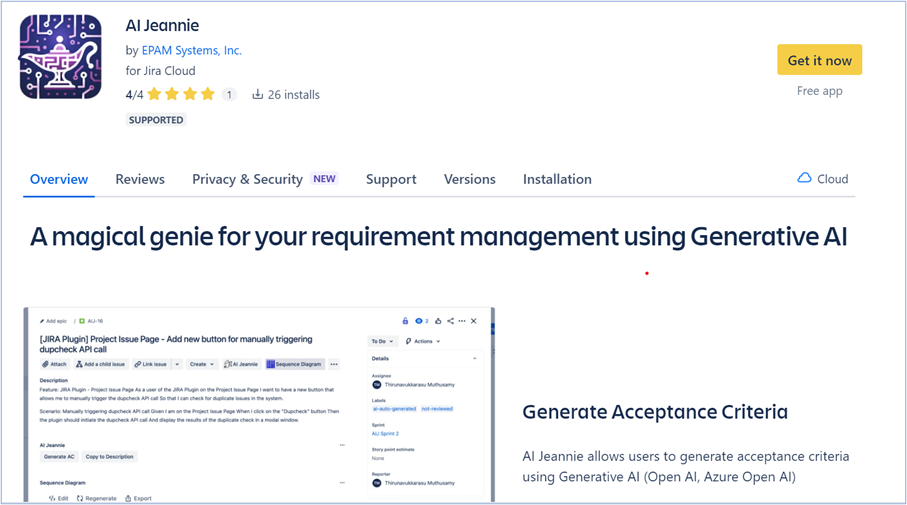
From search results, select AI Jeannie and the AI Jeannie installation screen appears as shown below.
-
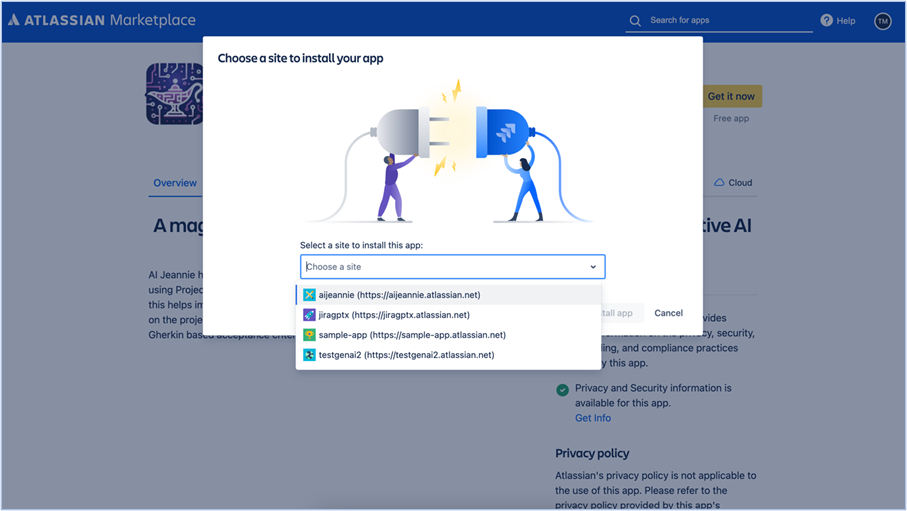
Click Get it now and select JIRA site, where you want to install AI Jeannie, as shown below.
-
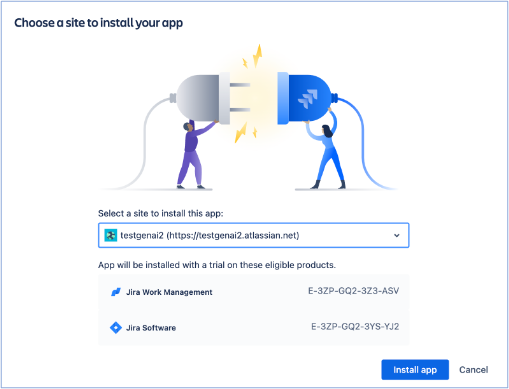
Once you have selected the JIRA site, click Install app, as shown below.
-
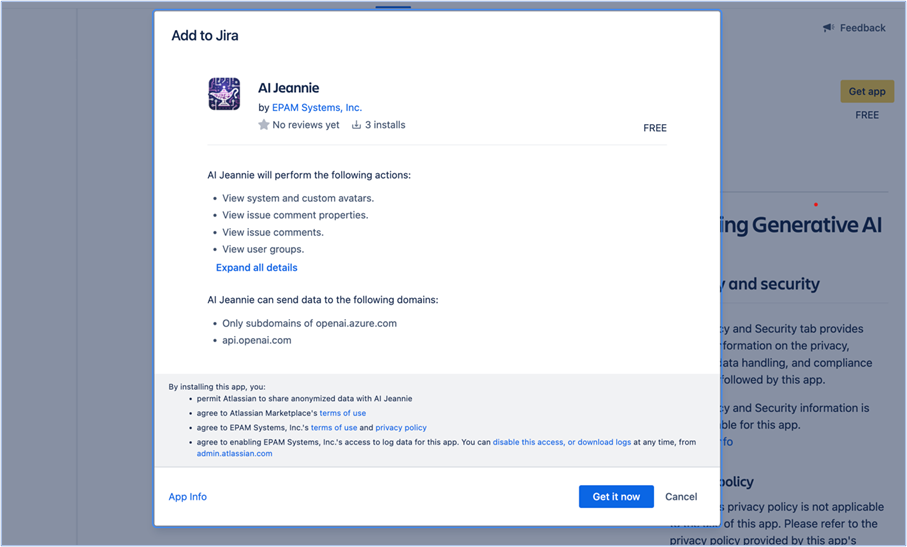
You will be redirected to “Add to JIRA” modal window. Review the terms and conditions, then click Get it now as shown below.
-
Once the installation is completed, you will be redirected to the “Manage apps” page. In this page, you can see the AI Jeannie JIRA plugin as shown below.
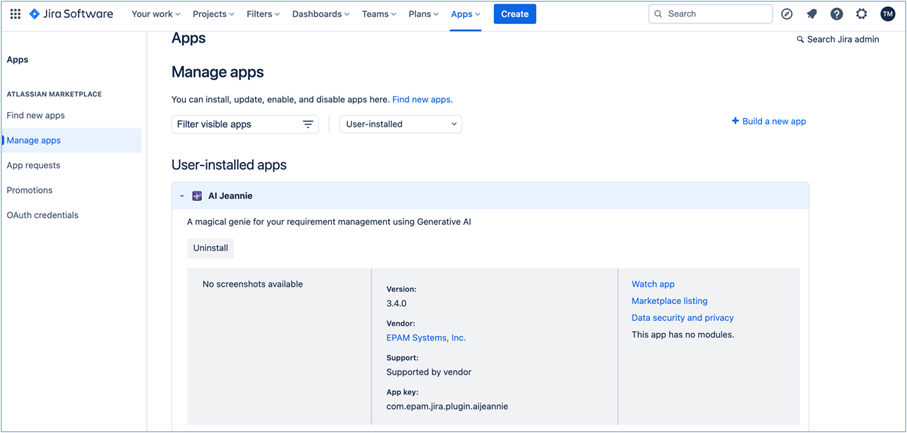
Here you can review the version, vendor, and screenshot of the plugin.