Using Images as Context
If user wants to provide additional context as attachments (format: JPEG) besides the project Definition, Epic, or User Story Summary. Check Is Multimodel check box in the AI provider Configuration settings screen. Provide the attachments along with Epics or User story description fields and click Generate AC button. AI Jeannie will then consider this description as well as the information present in the attachments as context and adjust the requirements accordingly.
Note: Multimodel feature is supported by models, which support multimodel input.
Steps to enable the Is Multimodel feature in AI Provider settings:
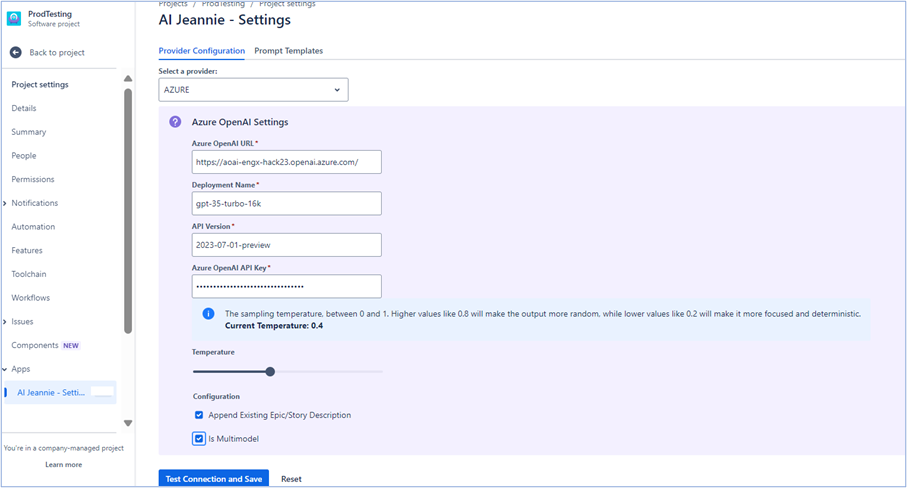
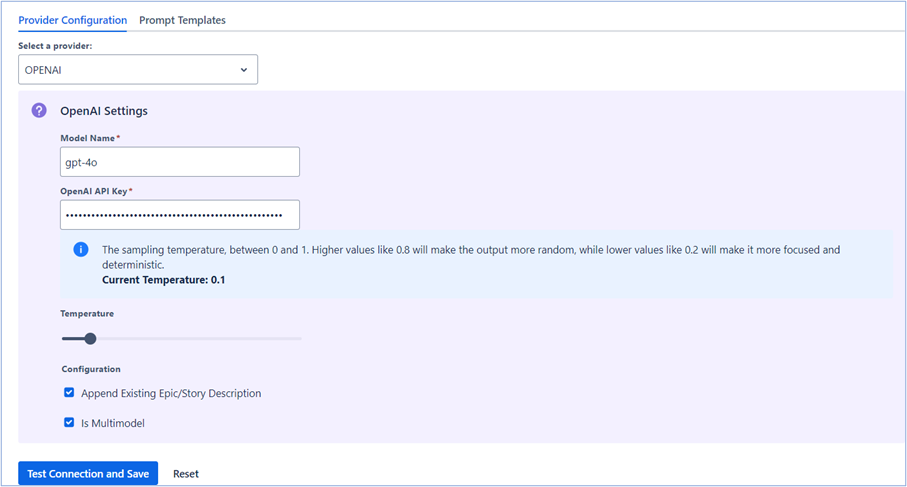
- Goto AI Provider Configuration settings page and enable Is Multimodel checkbox as shown below:
Azure Provider:
OpenAI provider:
-
Click Test Connect and Save to save the AI Provider configuration settings.
-
System will generate a success message stating that AI Provider settings are saved successfully.

Note: User should configure a model thats supports multimodel input like images, etc. If user configures a models which does not supports multi model input, then system will shown an error message.

- Verify the version and add the latest supporting AI Provider version then click Test Connect and Save.
Steps for adding the attachments while generating Epic/ User Story Acceptance Criteria:
- For instance, create an Epic and provide the additional context details as attachments, which you want to consider by AI Jeannie while generating the requirements.
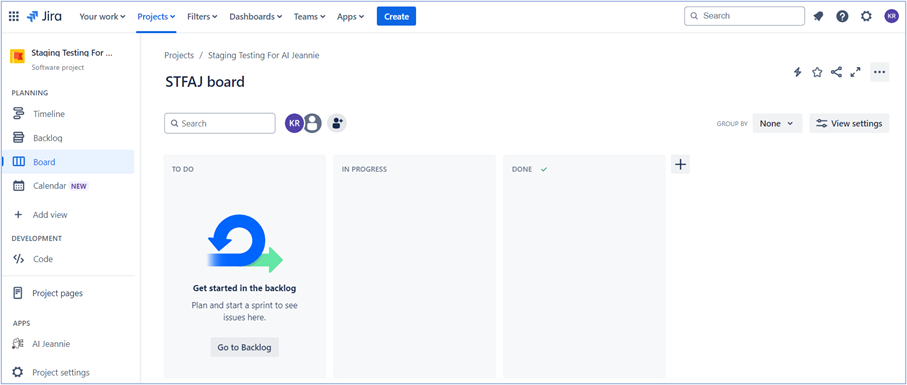
- From Jira dashboard, click Create as shown below.
- Enter the required details, browse and add the attachments in this screen which you want to provide as context while generating the requirements as shown below.
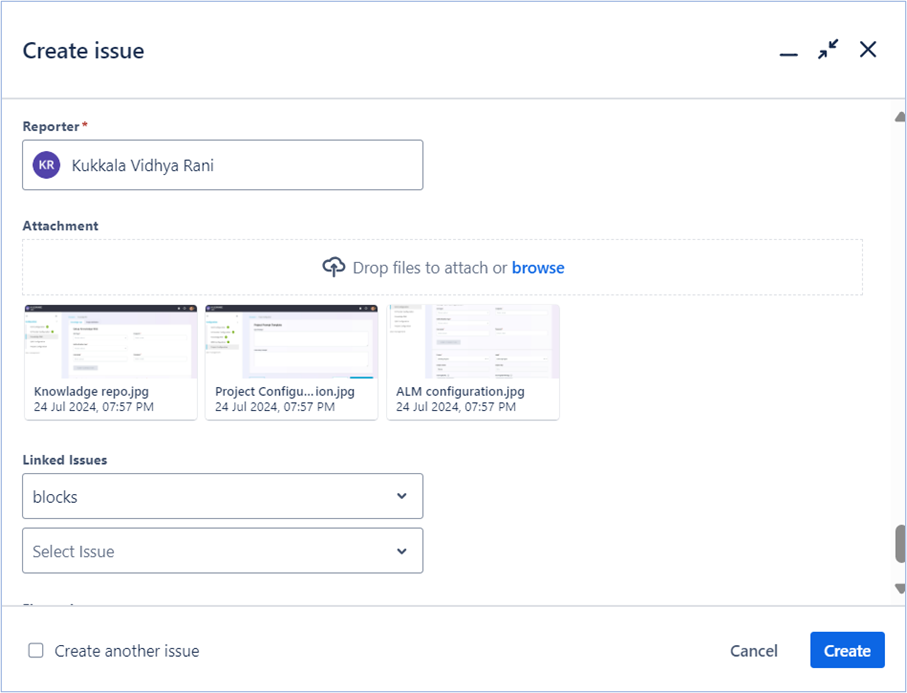

Note: User can attach maximum of 3 attachments only and system supports JPEG format with maximum file size of 500KB.
- Click Create and the description details are added as shown below.
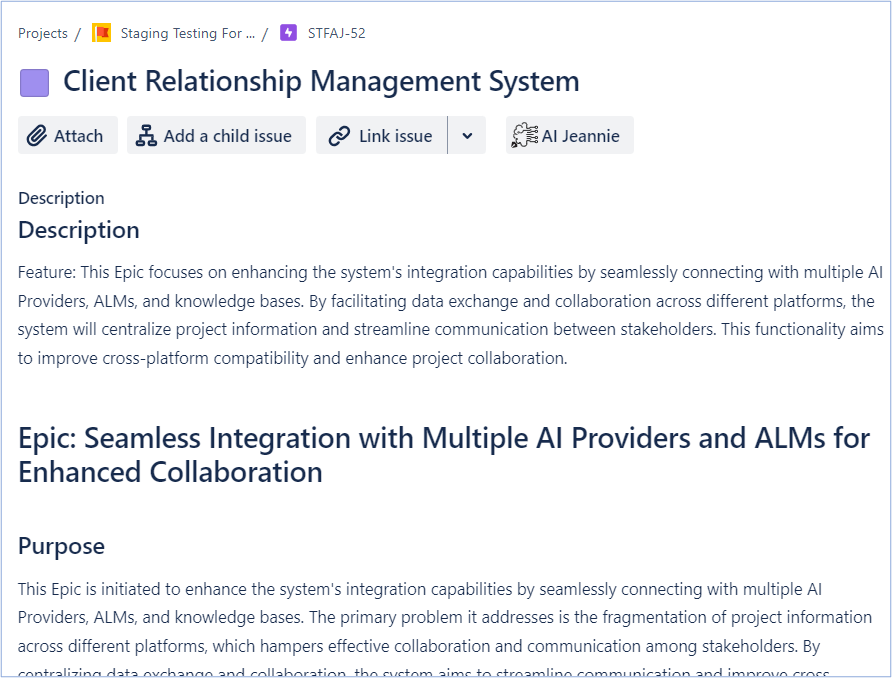
- Click AI Jeannie icon. System generates the Generate AC button on the screen as shown below.
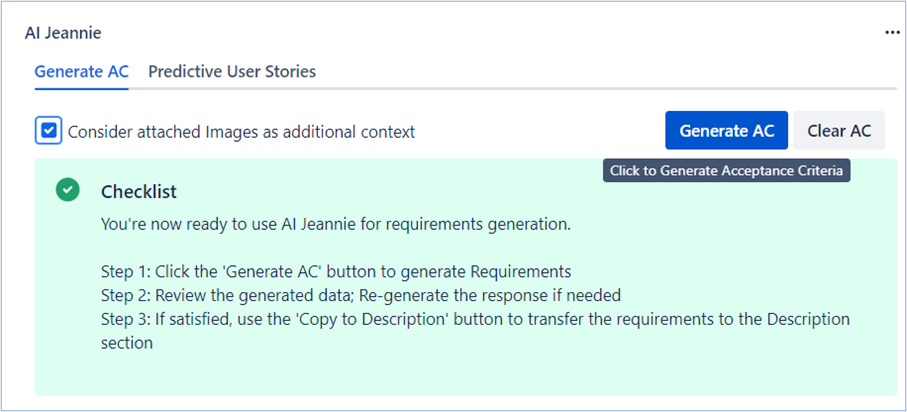
- Select the Consider attached Images as additional context checkbox and click Generate AC. The following Select Images Process screen appears as shown below.
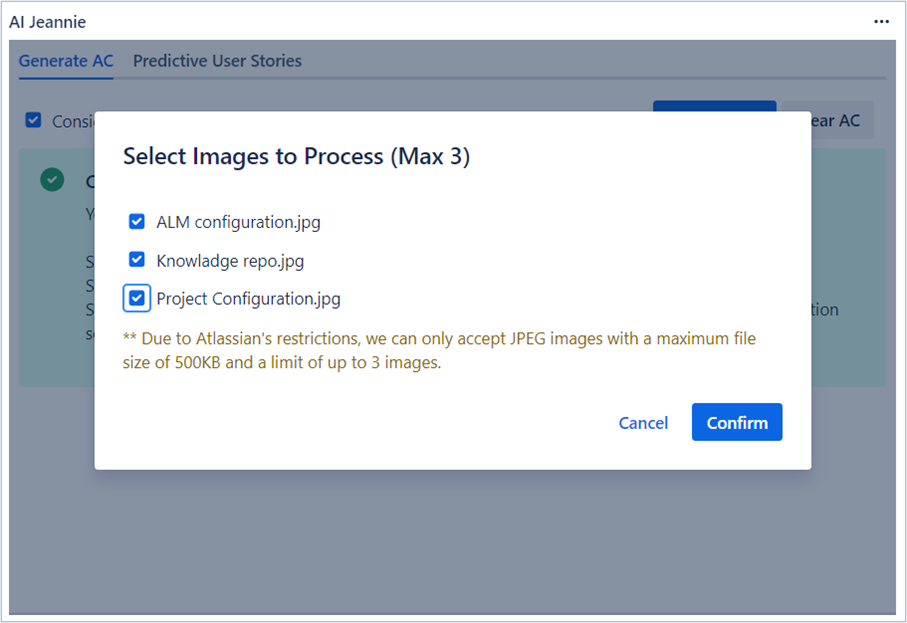
- Select the required Image attachments and click Confirm. System asks as to wait for few minutes for generating the Acceptance Criteria as shown below.

- The following Acceptance Criteria is Generated by taking the additional attachments information as context as shown below.
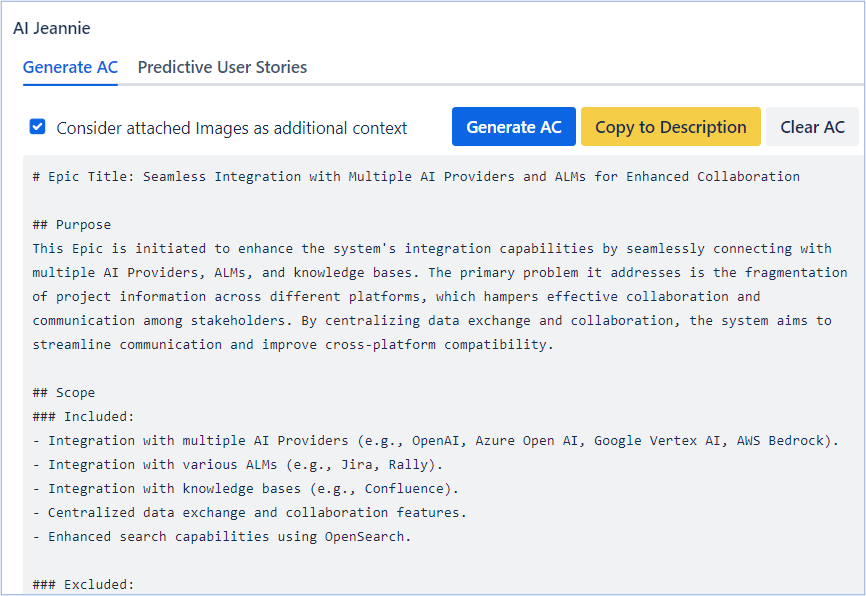
Here, AI Jeannie has considered the additional information as context provided in the attachments in addition to the existing contexts and generated the detailed requirements.